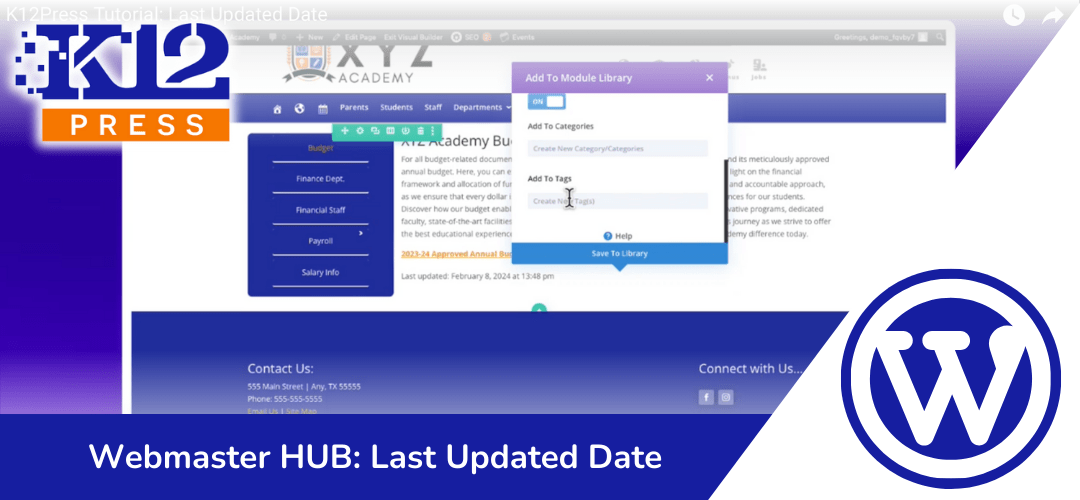
Ensuring that your school’s website content is current and reliable is incredibly important. Some webpages are updated frequently and users need to be aware of the most recent update by a date/time stamp. Recognizing this, our latest K12Press video tutorial introduces an essential feature for school websites: the “Last Updated” date display. This simple yet powerful tool keeps your community informed about the timeliness of the information they’re consuming, fostering trust and credibility.
Why Display the “Last Updated” Date?
The “Last Updated” message serves multiple purposes:
- Transparency: It shows visitors that your school is committed to providing the latest information.
- Accountability: Regular updates reflect the effort put into maintaining the website.
- User Trust: Knowing the information is current enhances users’ confidence in the content provided.
How to Implement the “Last Updated” Feature:
Our tutorial breaks down the implementation process into easy-to-follow steps, using a straightforward shortcode and Divi’s powerful library system. Here’s a snapshot of what you’ll learn:
- Inserting the Shortcode: Quick and efficient ways to add the “Last Updated” message using Divi’s text module.
- Creating a Reusable Module: Save time by creating a module in your Divi library, making it simple to add this feature across your website with just a few clicks.
Who Can Benefit?
This feature is a must-have for:
- School administrators keen on keeping their community informed.
- Teachers updating classroom pages or resources.
- IT staff looking for efficient ways to enhance the website’s functionality.
By the end of the tutorial, you’ll be equipped to add the “Last Updated” feature to your school’s website, ensuring that your audience always receives the most current information.
Stay Updated with K12Press
For more insightful tutorials and tips on making the most of your educational website, visit our blog at K12Press. Our tools and resources are designed to streamline website management, allowing you to focus more on education and less on technicalities.
Step by Step | Adding a "Last Updated" Message to Your School Webpage
1. Getting Started:
- Start by understanding the importance of adding a “Last Updated” string of text at the bottom of school website pages. This feature, common in many content management systems, is now recreated for WordPress through the K12Press Essentials plugin.
2. Checking the K12Press Essentials Plugin:
- Navigate to the your WordPress dashboard.
- Locate the K12Press Essentials plugin in the dashboard menu. Ensure the “Last Updated” shortcode option within the plugin is activated. If not, check the box next to it and click “Save”.
3. Adding the Shortcode:
- Copy the “Last Updated” shortcode provided by the K12Press Essentials plugin.
- Choose a page where you want to display the “Last Updated” message. For the tutorial, a subpage under the Finance section, like “Budget”, is selected.
4. Enabling the Visual Builder:
- On the selected page, enable the Divi Visual Builder by clicking the corresponding option.
- Find the section where you wish to add the “Last Updated” message, usually at the bottom of the page content.
5. Inserting the Shortcode:
- Insert a new text module or choose an existing one at the desired location.
- Paste the “Last Updated” shortcode at the bottom of the module content.
- Save the changes and exit the Visual Builder to view the updated page, now featuring the dynamic “Last Updated” timestamp.
6. Creating a Reusable Module:
- For ease of use across multiple pages, create a dedicated “Last Updated” module:
- Remove the previously inserted shortcode from the text module.
- Add a new text module and paste the “Last Updated” shortcode into it.
- Label this module “Last Updated” in the admin label for easy identification.
- Optionally, adjust the module’s padding for better spacing from adjacent content.
- Save this new module to the Divi library for future reuse across the website.
7. Utilizing the Library Module:
- Demonstrate how to quickly add the “Last Updated” feature to any page by using the saved library module.
- Highlight the flexibility of this approach, allowing for easy placement and styling of the “Last Updated” message according to the website’s design needs.


