Navigating a website should be seamless and intuitive, especially for educational institutions where information is vast and varied. Recognizing this, K12Press is thrilled to unveil our newest tutorial video focused on the K12 Essential Plugin feature: Navigation Menu Roles. This guide is not just a tutorial; it’s a transformative approach to customizing your school’s website navigation, making it more organized, accessible, and user-friendly.
Streamlining Site Navigation with Navigation Menu Roles
The Navigation Menu Roles feature within the K12 Essential Plugin is a pivotal tool for any educational website. It allows webmasters and educators to create hidden menu items tailored to different user roles, ensuring a personalized and efficient browsing experience. This tutorial video takes you through the entire process, from initial setup to advanced customization, including how to:
- Design Hidden Menus: Structure your website’s navigation to cater specifically to students, staff, parents, or visitors, keeping essential information at their fingertips.
- Customize with Precision: Learn to adapt the appearance and functionality of your hidden menus to reflect your school’s brand and ethos, enhancing the overall aesthetic and user interface.
- Enhance User Experience: Discover the significant impact that well-crafted hidden menus can have on your site’s navigability, making crucial content accessible with minimal effort.
The Importance of Tailored Navigation
As digital platforms become increasingly central to educational engagement, the clarity and efficiency of your website’s navigation system cannot be overstated. Hidden menu items, enabled through the Navigation Menu Roles feature, offer a streamlined and sophisticated solution, addressing the unique needs of your diverse school community.
Join the Tutorial Journey
Embark on this educational journey with K12Press and transform your school’s website into a more navigable, engaging, and organized space. Watch the tutorial video here: https://youtu.be/P64LfK7yiIg, and arm yourself with the expertise to revolutionize your website’s user experience.
For an endless reservoir of resources, tips, and guides to amplify your educational institution’s digital presence, make your way to K12Press. Stay connected with us for the latest updates, tutorials, and insights, all designed to bolster your school’s digital narrative. Together, let’s craft educational websites that are not only informative but also engaging and accessible to our entire learning community.
Step by Step | Create Hidden Menu Items with Navigation Menu Roles for Internal School Communication
Step 1: Introduction to the K12Press Essentials Plugin
Internal communication websites or pages that are viewable only by registered users or staff, emphasizes the need for hidden menu items to keep internal links private from the general public.
Step 2: Accessing the Dashboard
Navigate to your site’s dashboard by hovering over your name at the top and selecting “Dashboard.” This is your control center for making backend changes to your site.
Step 3: Enabling Nav Menu Rules
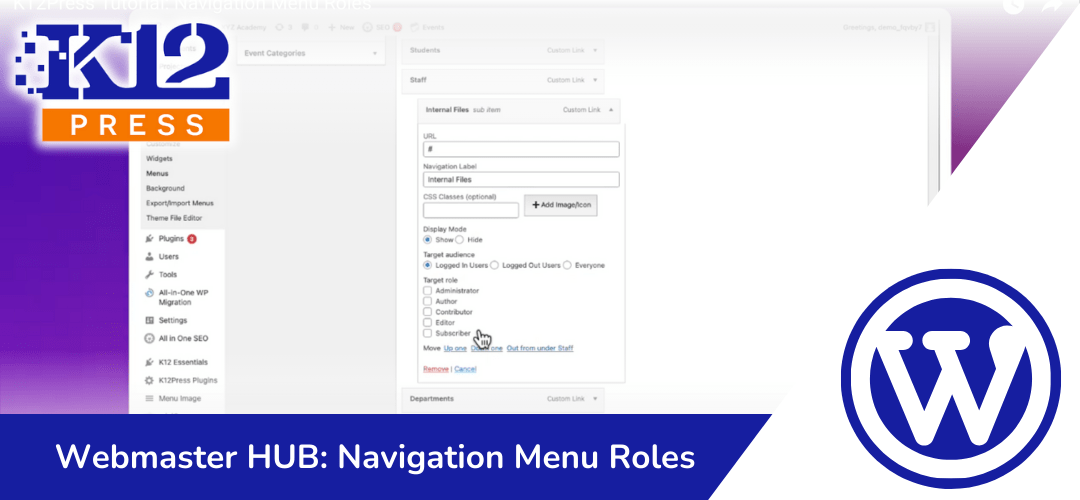
In the dashboard, scroll down to find the K12 Essentials plugin. Ensure the “Nav Menu Rules” option is checked. If not, check it and click “Save Changes.” This action activates the feature that allows you to control who sees which menu items.
Step 4: Managing Menus
Go to the “Menus” section under “Appearance” in your dashboard. Here, you’ll manage your site’s main menu structure. For the tutorial, We use the “XYZ Academy” demo site as an example, focusing on adding internal or third-party links to the “Staff” section in the navigation menu.
Step 5: Customizing Visibility
Once you add a link to your menu, click the dropdown arrow to expand the menu item settings. Here, you’ll find the “Target Audience” setting, where you can specify who can view this menu item: logged-in users, logged-out users, everyone, or specific user roles.
Step 6: Applying Settings
For most educational sites, you’ll likely toggle between “Logged in Users” for internal content and “Everyone” for public content. This ensures that only registered members can access certain pages or resources.
Step 7: Reviewing Frontend Changes
After setting up your menu items, log out of your site to see the changes from a public perspective. Menu items set for “Logged in Users” won’t be visible, ensuring privacy for internal resources.


